|
|
| By John Finnemore |
| |
| showing in detail |
|
How To Set A Mole Trap |
| to get rid of mole problems |
| with |
| Mole Catching
Techniques |
|
and including |
|
How to redesign some traps for better
mole catching. |
| |
|
Everything you need
to know, to be successful, in trapping moles. |
| |
|
The American MolePro Mole Trap Is Now Featured On This Website. |
|
For people who want a better way of setting traps in their yard. |
|
------------------------------ |
|
In March 1966, I wanted to find a
better way of catching moles, with the use of traps, so I asked a
retired farm worker and mole catcher, Harry Redding, to show me how
to do it.
|
|
I immediately started to catch moles,
so I decided to keep a daily record on how many I caught and from
which fields. I still have the records.
|
| |
|
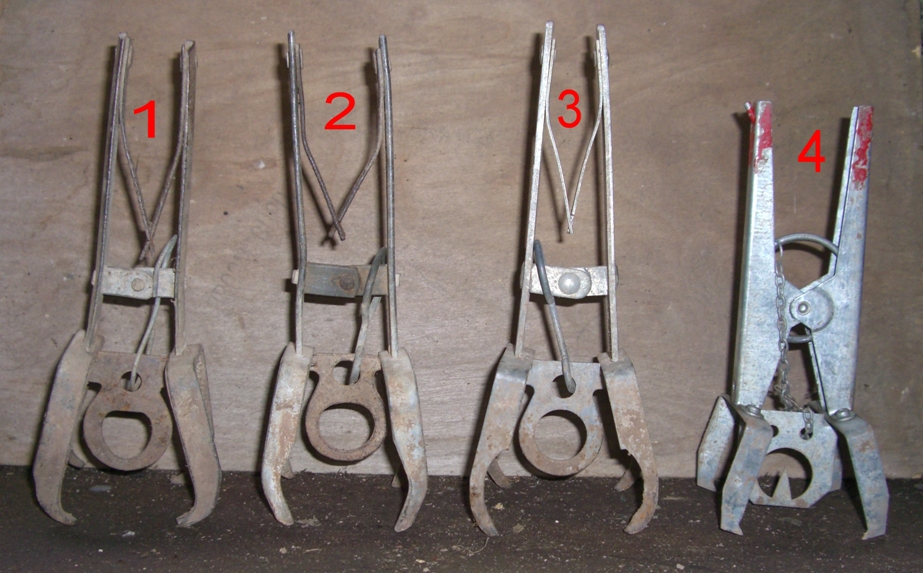
These are the numbers of the moles caught per
month and the type of traps used. |
| 1966 |
|
 |
| March |
81 moles in 3 weeks. |
| April |
70 |
| May |
45 |
| June |
37 |
| July |
7 |
| Aug-Nov |
No traps set |
| December |
125 |
| 1967 |
|
| January |
105 |
| February |
13 |
| Total.............. 483 moles caught in 12 months or should
I say 8 months. |
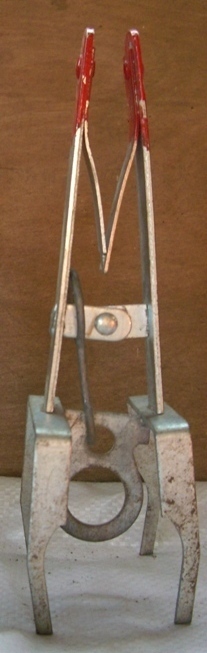
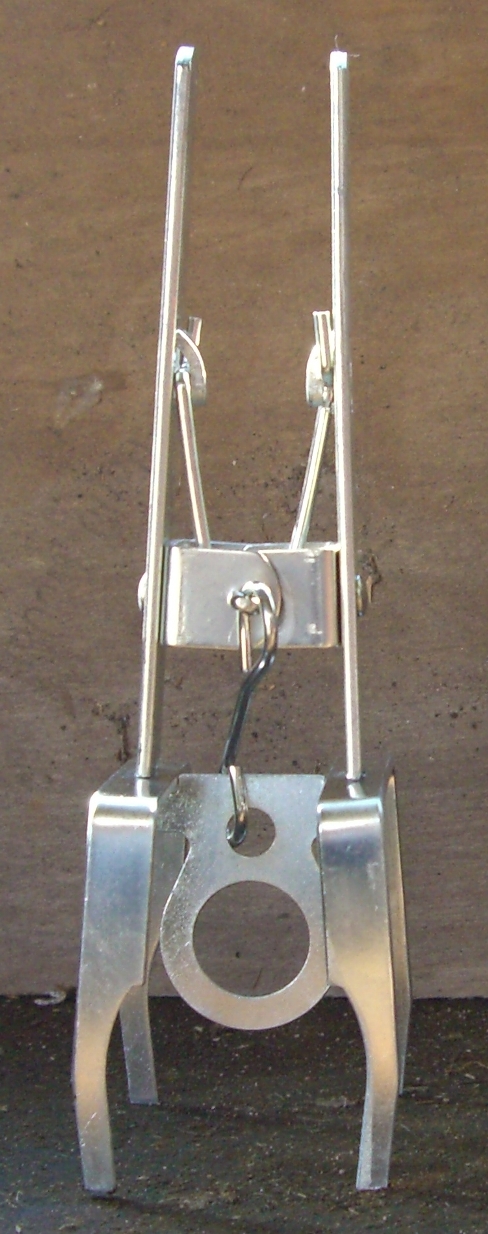
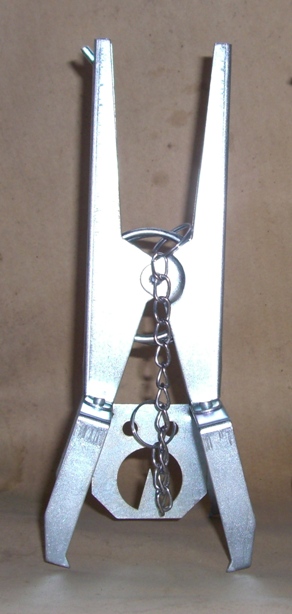
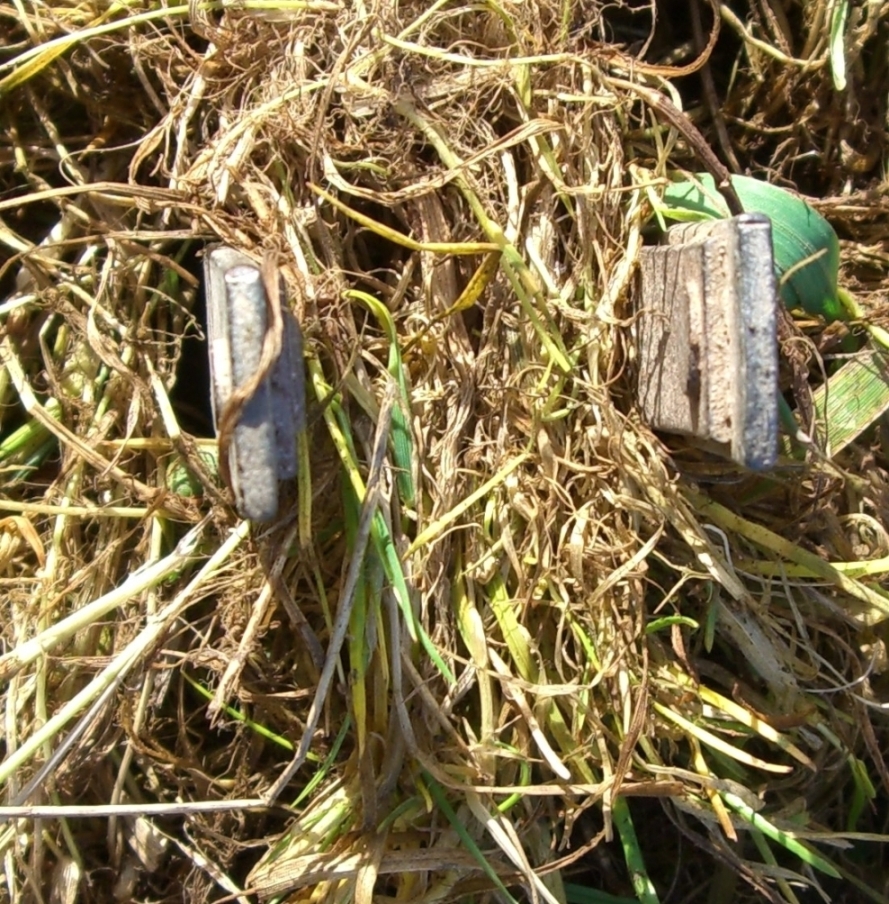
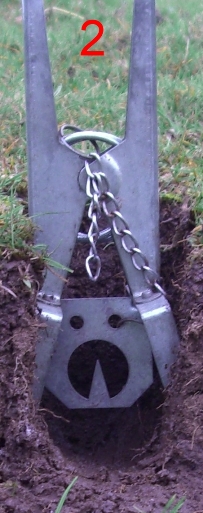
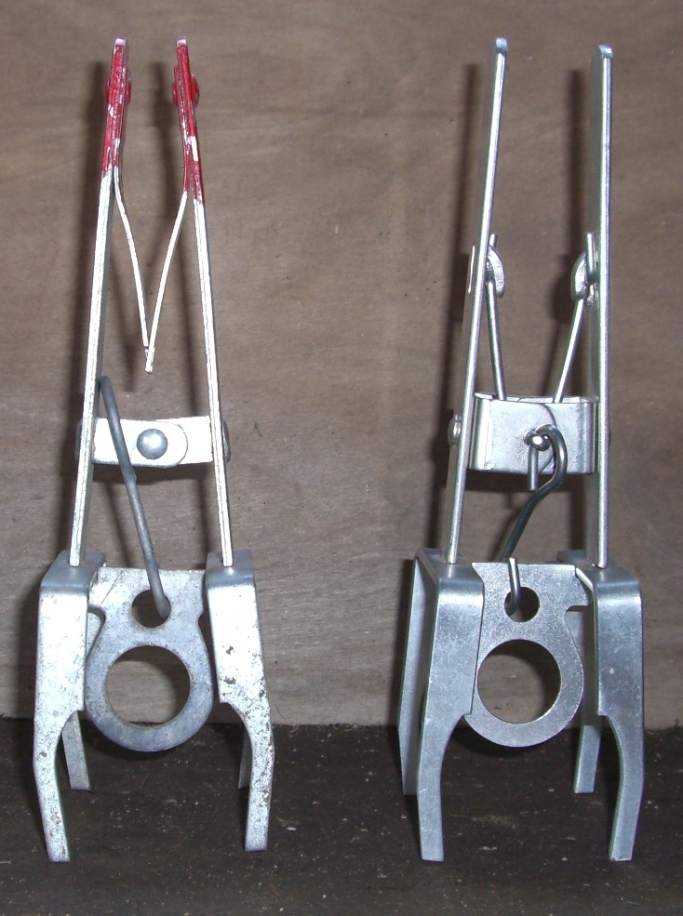
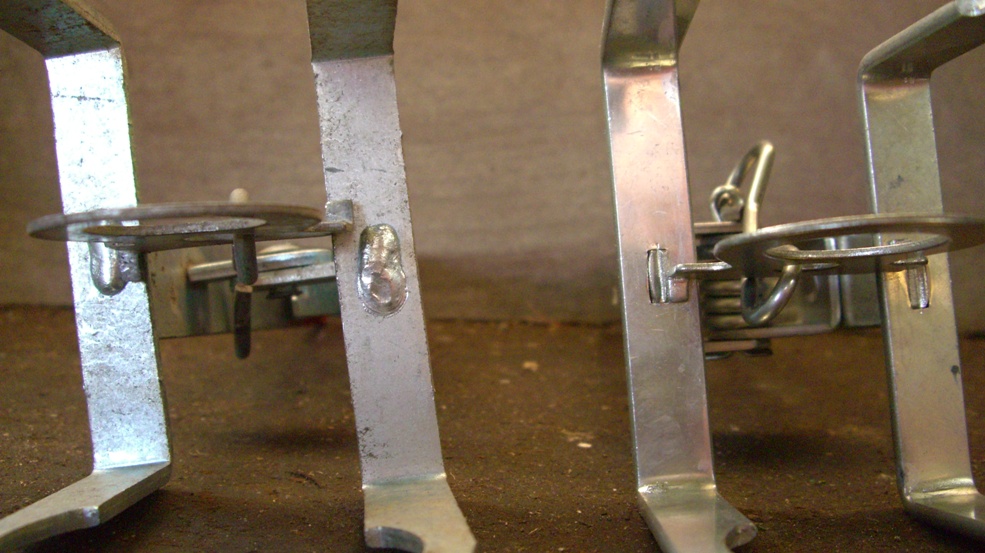
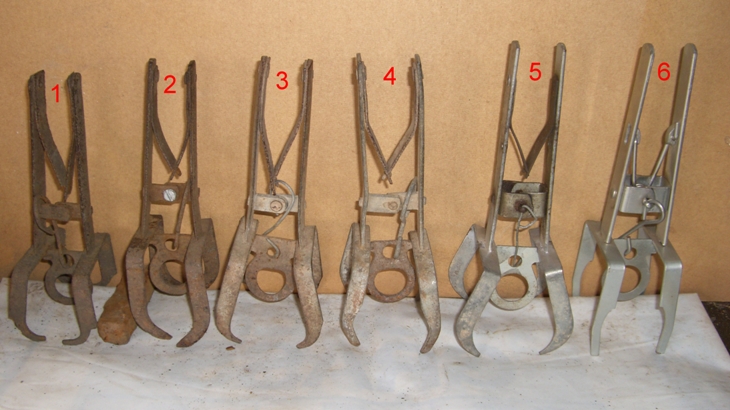
The trap on the right is the same design of traps
which were
bought in 1966. The original ones are all broken. The other
two traps which are older, were used in 1966 and are still being used. |
| |
|
I trapped another 29 moles in 1967
making a total of 512 moles before I stopped recording numbers
caught as there were no more moles to catch. |
|
--------------------------------------------- |
|
The method that I was
shown in 1966 of setting a mole trap, proved very effective to
enabled me to catch all the moles on the farm, but my average
percentage rate at the time was between 30% to 40%. |
|
The intervening years
since 1966, I have developed a far better way of setting a scissor
mole trap. 100% catching rate is now expected and a lot of people
have achieved this after reading this website. |
| |
|
Full Instructions On |
|
How To Set A
Scissor Mole Trap, At Any Depth, |
|
For A Guaranteed Way Of Catching
Moles. |
| |
|
The John Finnemore method of
setting a scissor mole trap. |
|
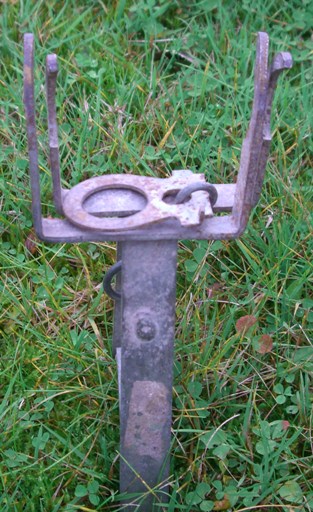
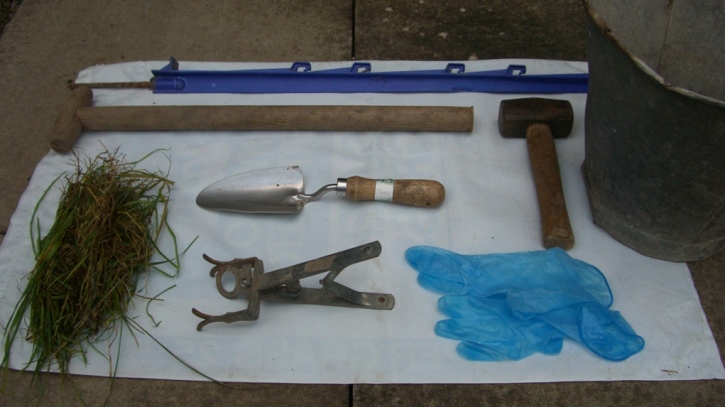
All items that I use for
setting a mole trap. |
|
 |
| |
| Bucket to carry the items. |
| Plastic bag to kneel on. |
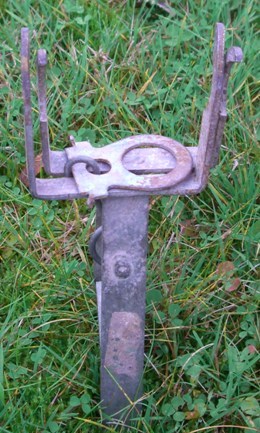
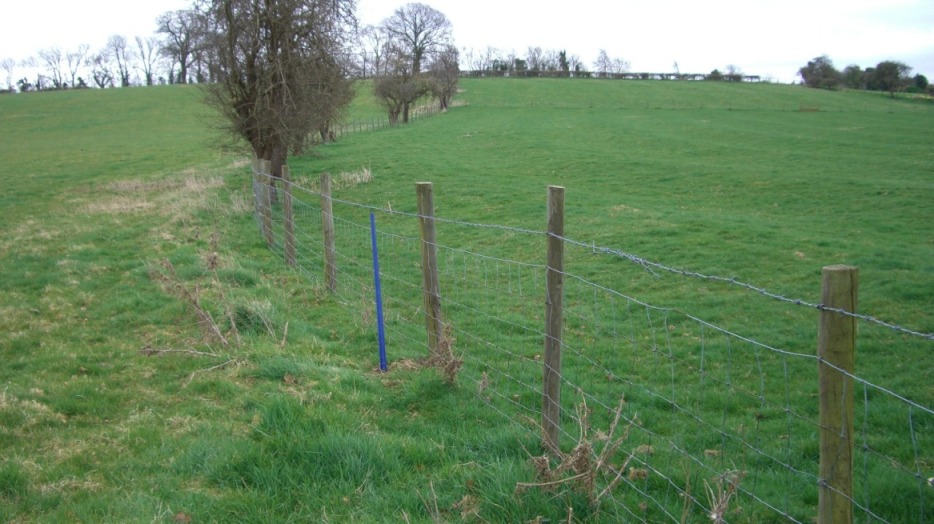
| Electric fencing post to use as a probe, to find the
mole run, then leave it to show where the trap has been set. |
| Trowel with a solid stem to the handle for strength,
to make a hole, which is narrower than the width of a trap. |
| T-handle and a club hammer, to consolidate the ground in the mole
run. |
| Scissor mole trap. Many traps are useless without alterations being made to them.
Read all the information on correcting badly designed traps and make alterations
if necessary before setting any traps. See Menu. |
| Soft matted grass for use in setting the trap. Soft
matted
grass can often be pulled up from near where the trap is going to be
set, otherwise I have to find some from elsewhere. |
| Rubber gloves. I only use them when the soil is
wet. |
| The only extra items that I carry are more traps
and electric fencing posts for marking mole trap positions. |
|
--------------------------------------- |
|
The Emails show what can be achieved by following the very detailed
advice shown on this website. |
| |
|
Email received 15/02/2015
Cumbria
|
|
Hi John, just a quick update to
let you know what's happened. I re read your website and realised
that I was trying to compact loose soil rather than remove it. I
therefore removed the soil and dug down
slightly deeper, checked the traps today, 7 sprung and six moles
caught. I'm happy with that average! Thanks again.
|
|
DT |
| |
|
Email received 22/02/2015
|
|
Dear John,
|
|
As a beginner to the world of mole catching, I fortunately stumbled
across your website in my quest to ensure I beat the little b@#gers
right from the off. Back garden environment, 2 days in, 2 moles
down. Thanks to your advice, I am aglow with smugness. |
| T |
| |
|
Email received 04/03/2013
|
|
John,
|
|
I'd been trying to catch moles for a week or so and
had the usual frustrating problems with empty traps, buried traps
and traps without any action at all. I found your site on Saturday,
tried to replicate your methods and caught 3 moles in 36 hours.
Very many thanks. |
| CB |
|
Email received 09/06/2013
|
|
Just
to let you know I have continued mole catching. I am practicing on
a friend's farm and have now had a total of 67 moles. He is
delighted. One trap by a stream has delivered 8 of these. |
| CB |
| |
| Email received 16/02/2013 |
|
Thank you for all the
information on your site about "how to catch moles". I have tried
over the past 30 years to catch them when they have invaded the
garden, but without any success. However when recently there
was mole activity in the vegetable patch and in the asparagus bed,
my wife decided I should have another go! So after a bit of
internet research, I spotted your website, and went to work. Over
about a fortnight, I have now caught ten moles, two were in the
garden, and the rest in our two "3 acre home fields". Mole hill
activity appears to have ceased!
|
|
So thank you for your
advice.
|
|
JB |
| |
|
Email received 07/08/2011 Surrey |
|
Despite having 3 different companies in
to deal with moles in our garden, and after forking out a lot of
money, the problem was never solved for 3 years…until I came
across your website. |
|
LG |
| |
|
Email received 13/12/2010 Wales |
|
Hi John. Just wanted to let you know how
brilliant your instructions are. We recently moved into a
smallholding where moles had been running riot over an extended
period of time. The previous owner had tried many different methods
but none worked. My husband applied the information from your site
and within 2 days had caught 2 moles. Today he has caught 3 moles
from 4 traps, the 4th went off but no mole in it. Even the
neighbours are impressed! Many thanks again. D and M
|
| |
|
Email received 18/03/2010
|
|
D ear John |
|
I have just come across your
valuable web page on catching moles and would like to suggest
farmers take your advice, and so have added the site as a link
on www.farmideas.co.uk
|
|
Best wishes, and congratulations on
some really first class research that has the potential to save
farmers £millions in spoiled silage, listeria, damage to mowers
and so on. |
|
Mike Donovan |
|
Practical Farm Ideas |
| |
|
How To Set A Mole
Trap. |
|
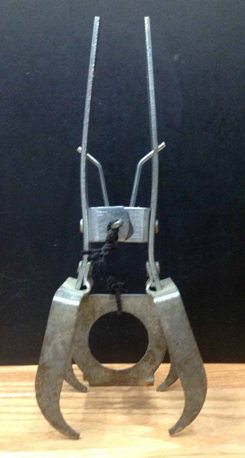
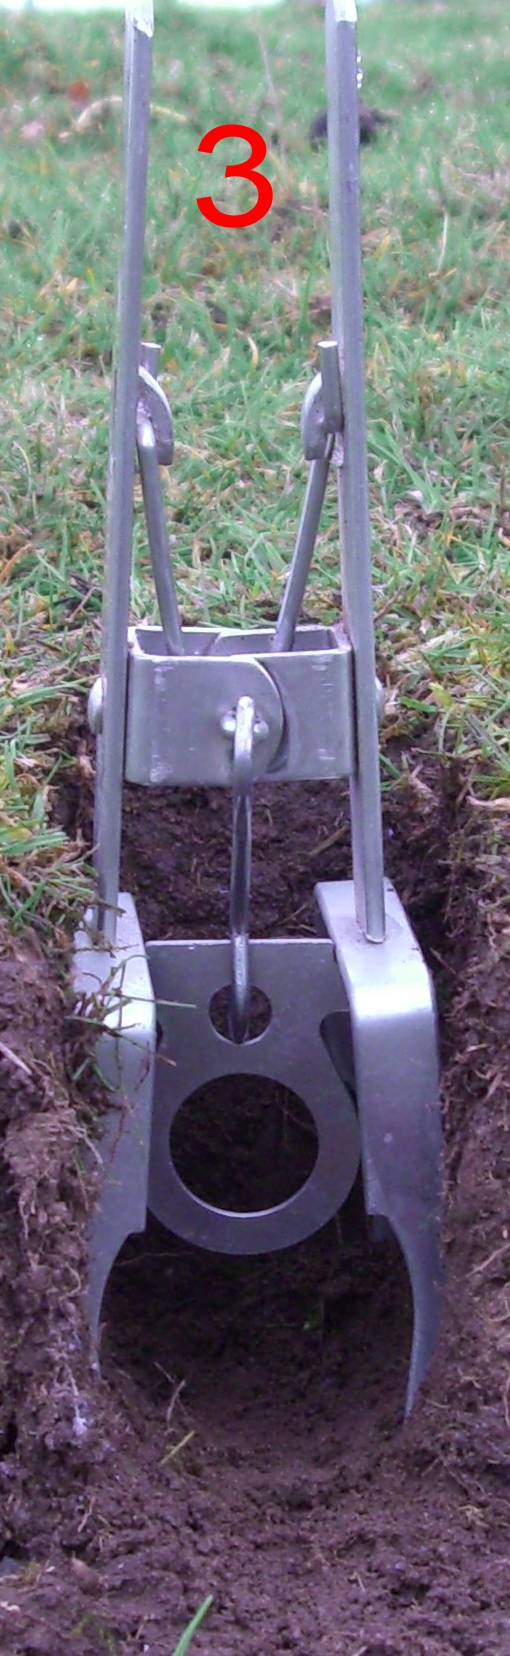
A scissor mole trap |
|
|
|
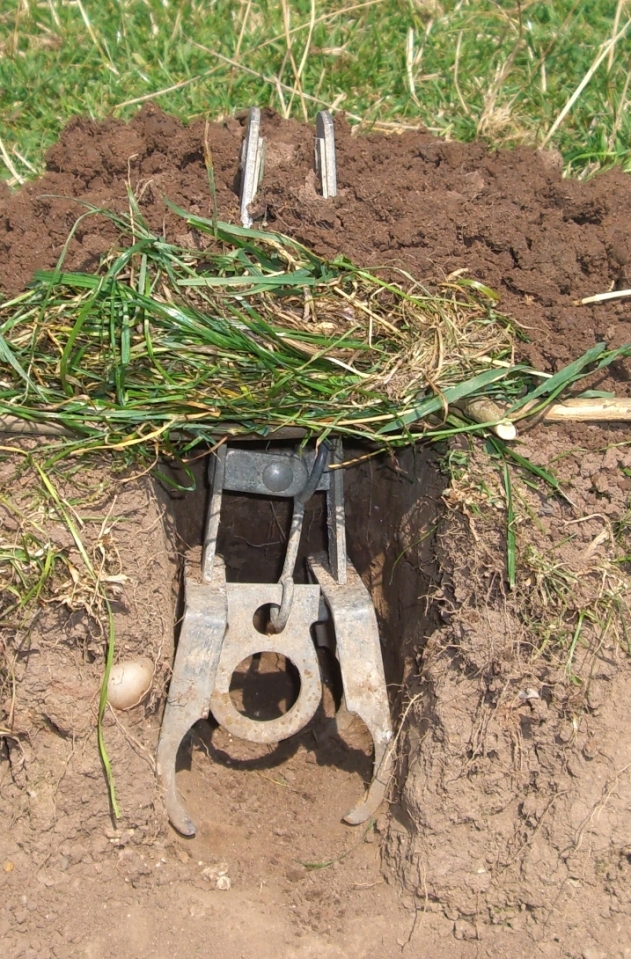
The trap has to be set into a tight-fitting hole with no loose
soil lying in the mole run. |
|
|
|
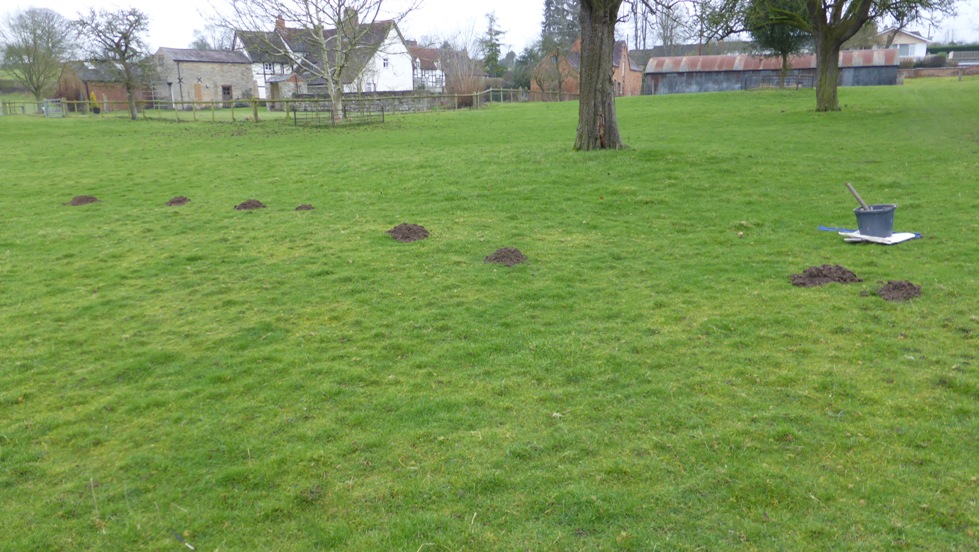
Please read 'The Best Places To Set A Trap' from the Menu before
actually setting a trap. The worst place is between fresh molehills. Set
traps at least 18 inches from the centre of the nearest molehill. |
|
|
|
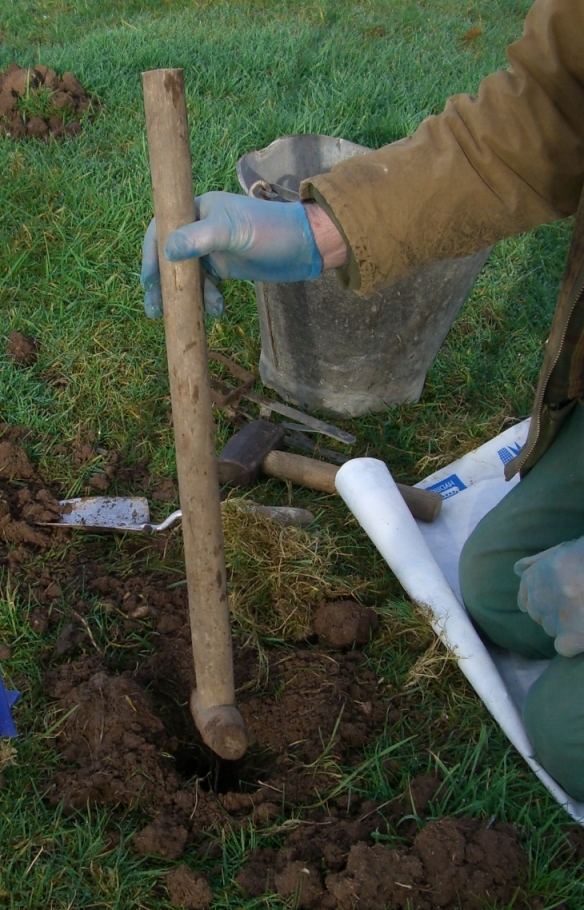
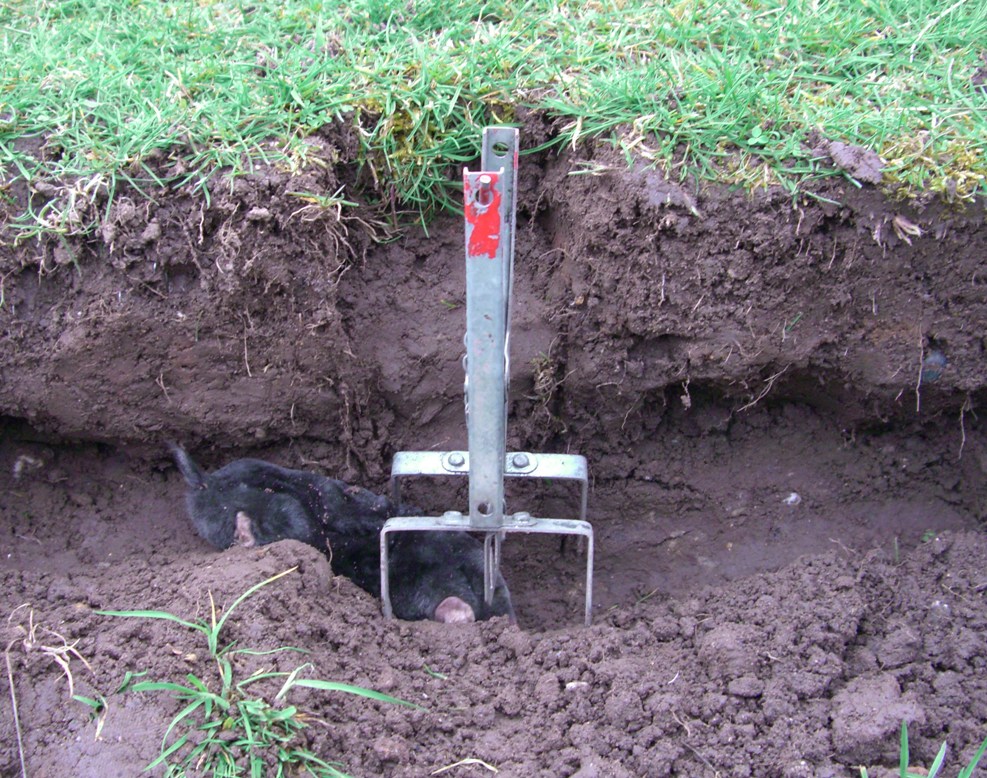
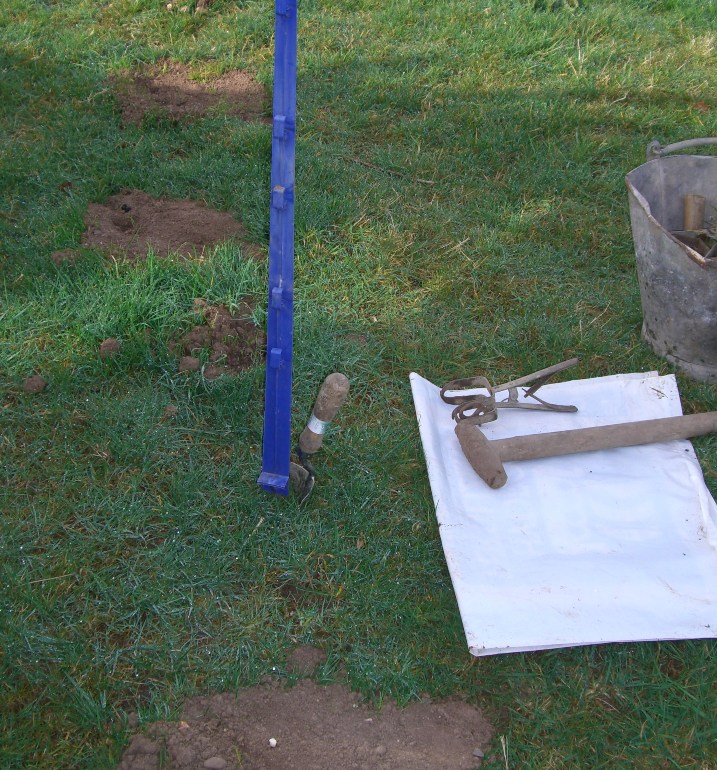
Finding the mole run. |
|
 |
|
The spike on the electric
fencing post is used as a probe to find the mole run between two
molehills after prodding the ground several times. You will easily
be able to know when you have found the mole run as the spike will
suddenly go in quicker. On peat soils a proper designed mole run
probe would be better. This type of probe has a spike wider than the
stem. |
|
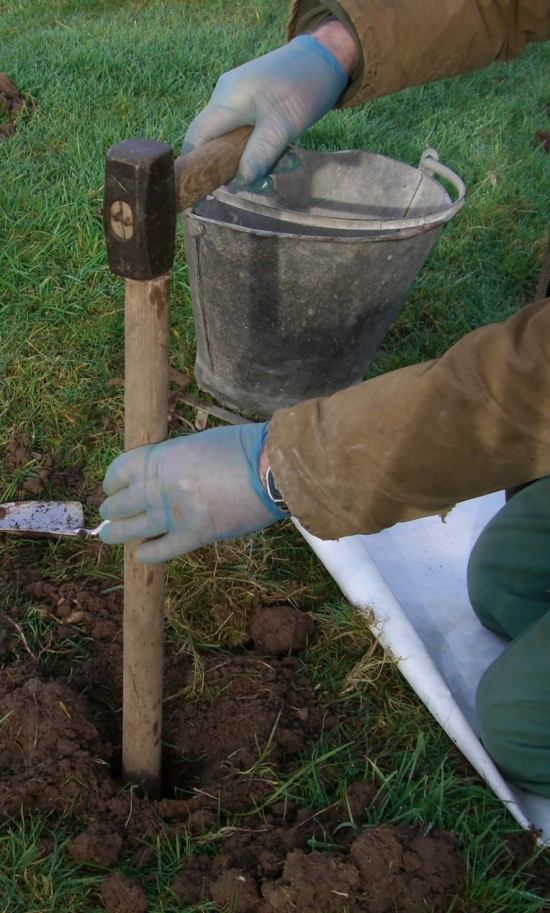
Where
the probe has found the mole run, I push the trowel into the ground, which is parallel with the mole run. (Do
not use a knife and cut a round sod of turf out). I will
now lift up the turf with the trowel, just wide
enough to squeeze my hand through, to find out the angle and the
centre of the mole
run and to make sure there are no other runs branching off. If there
is a run branching off, fill it in and find another place otherwise
fold back or remove the turf, directly above the run. |
|
|
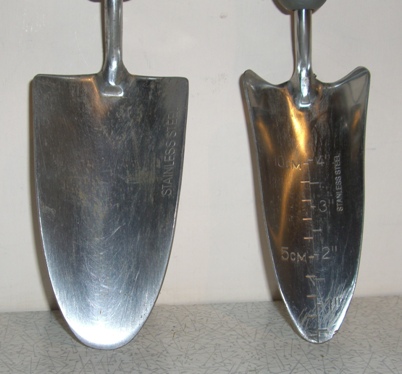 |
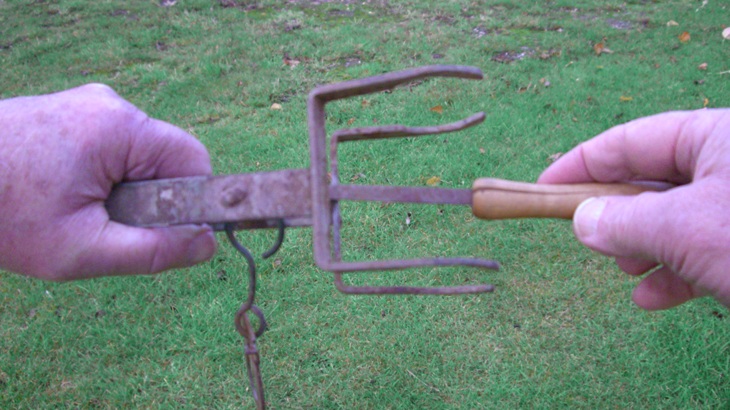
Most
trowels, like the one on the left, are wider than the mole run, so hold the trowel on an angle
to avoid making the hole too wide.
|
|
The trowel on the right is the ideal size to
use. This trowel has measurements on it for planting out plants to a
certain depth which is not needed to set a trap. I found the trowel was
too pointed when bought to scoop soil from the mole run so I ground
off the point to make it more rounded.
|
|
|
|
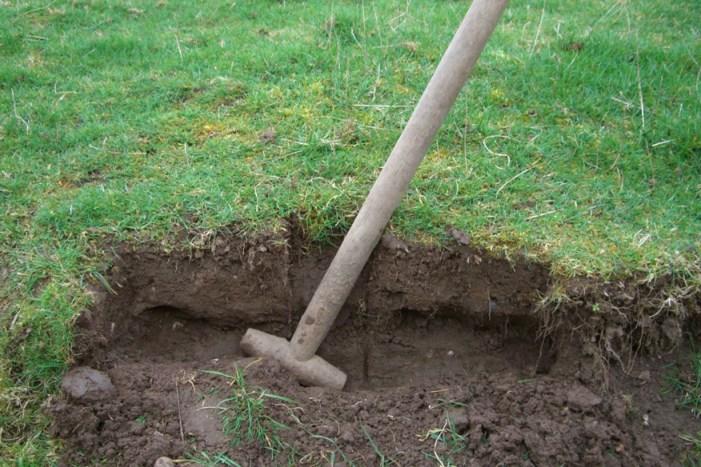
Normally one has to remove soil to make
a hole for the trap but if you find the soil very soft or loose, then widen the hole by pushing the
soil sideways with your trowel or
hands and only remove soil from the side of the hole if necessary, to
expose the mole run. This helps to firm up the sides of the hole. |
|
The correct size of hole
is narrower than the width of the trap,
when the ground is soft. This
enables the legs of the trap to be set into the side of the hole. If
you are finding it difficult not to make the hole too wide then use
a narrower trowel. |
|
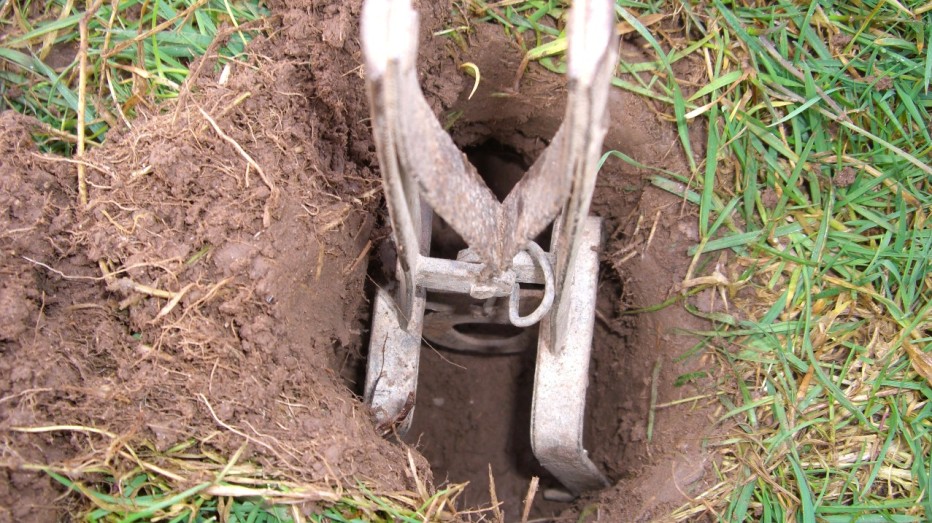
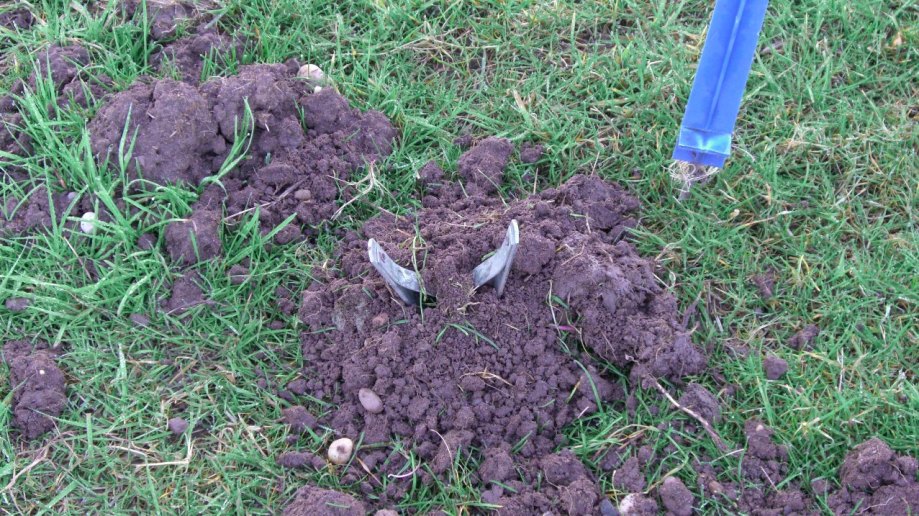
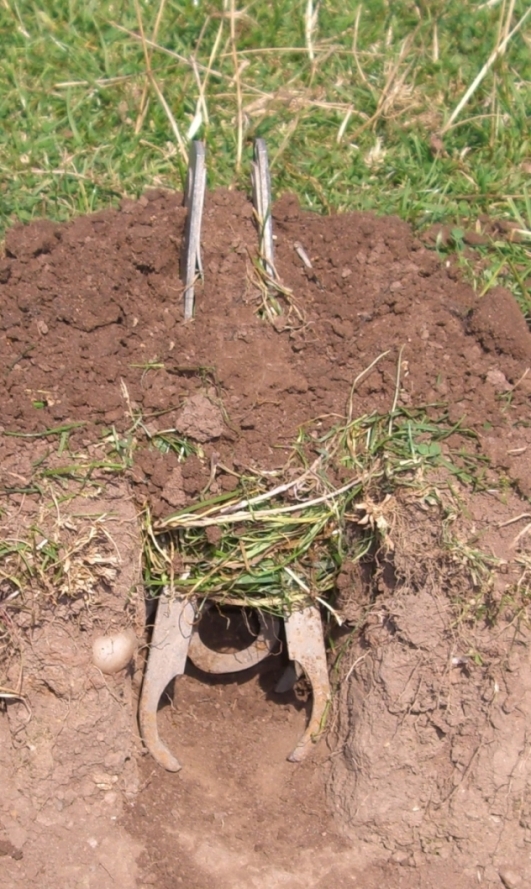
Ease a trap that has been set into the hole by moving
the trap forwards and backwards as you are pushing it down into the
hole. Make sure the trap is in alignment with the mole run. |
|
This procedure makes a groove
with the legs of the trap down the side of the hole, which helps to
support the trap and allows the trap to close quickly when
triggered. |
|
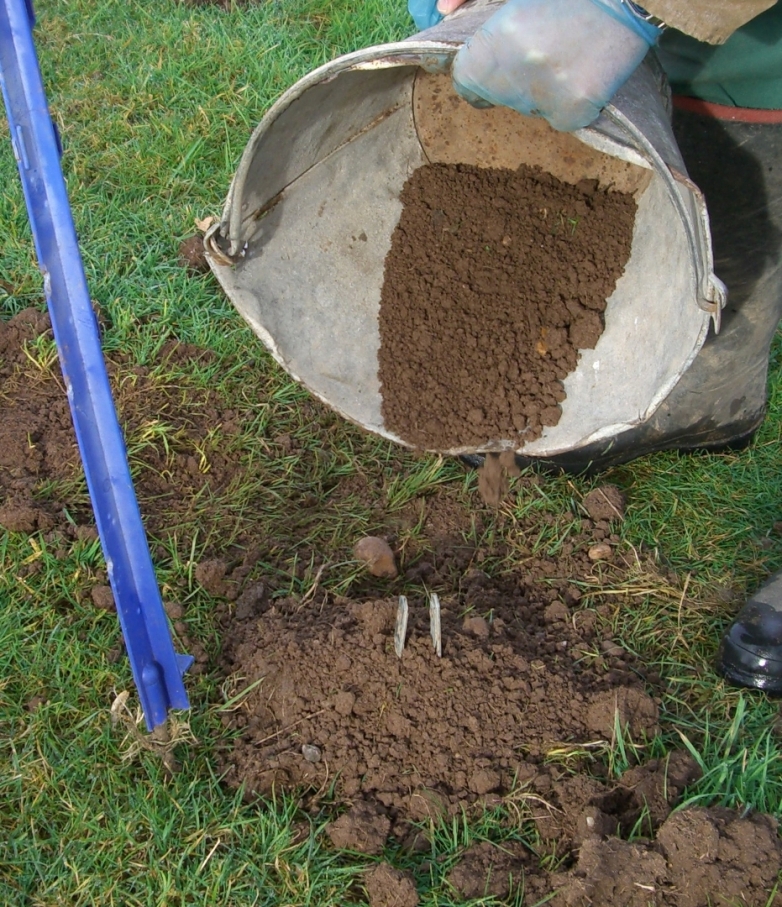
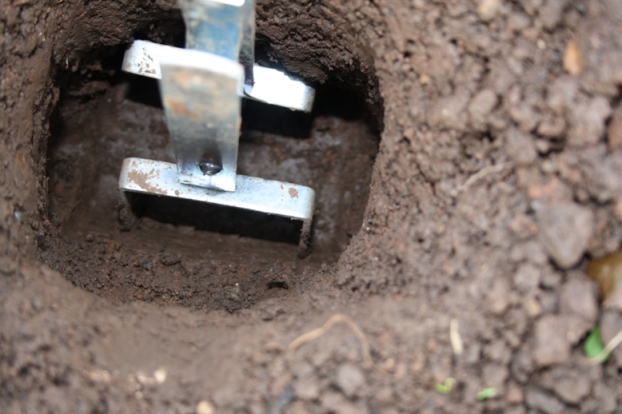
Now the hole is the correct size in
width, remove the trap and any loose soil
because you are now ready to consolidate the mole run. |